Ombre Gender Reveal Cake // Coconut Cake
We’re expecting baby #2! I had always wanted at least two. But I did not enjoy pregnancy at all (severe nausea/vomiting requiring round the clock medications, an unfortunate ER visit, and requiring medical leave), and we spent many sleepless nights in a haze with a newborn. I recall telling my husband “That’s it! We’re one and done!” after a particularly bad night.
However, the wonderful moments watching baby grow up + time make you forget the struggles… and you end up wanting another baby.

B was thrilled, as he adores children and if it were up to him, we’d have 5 babies (I told him, that’s not happening).
We were very lucky our timing worked out well, as I wanted to have my second during my research years of hematology-oncology fellowship. The hours are more flexible, I can work mostly from home (so much nicer to throw up at home instead of the hospitals), I’m not on call as much, and I don’t need as much coverage during my maternity leave.

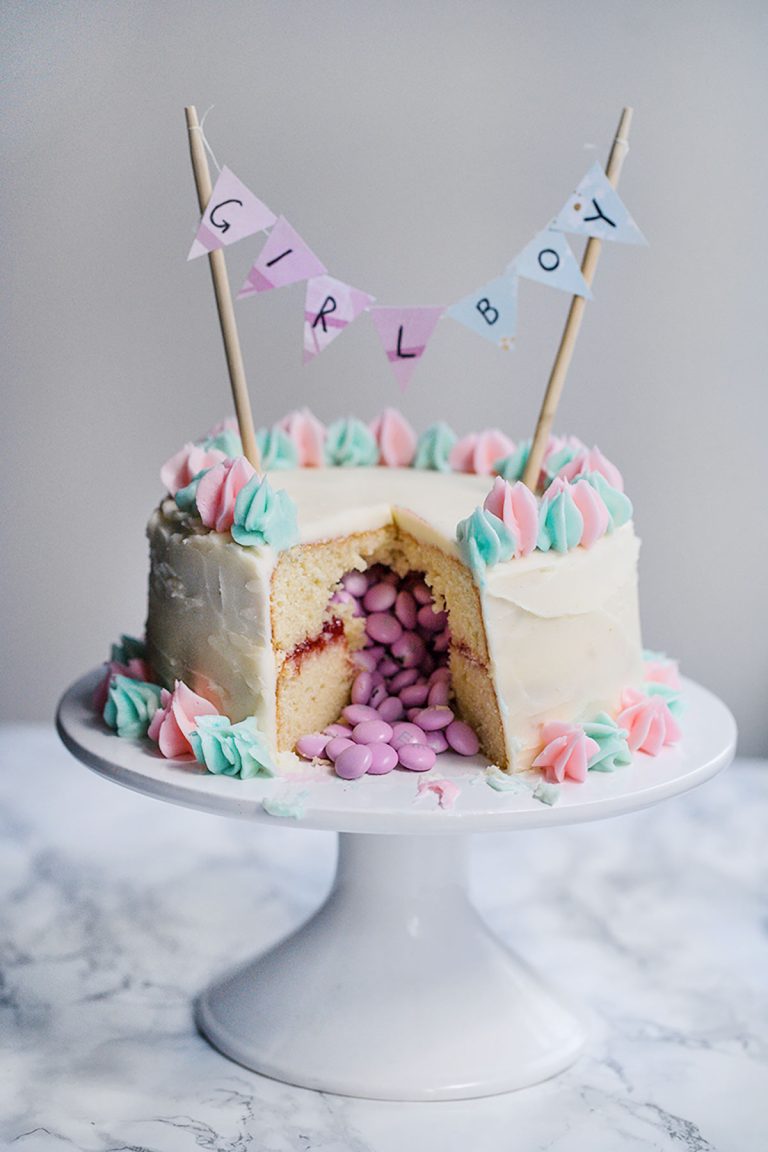
Having a baby is a great opportunity to bake fancy cakes, and a gender reveal is always super fun. I made an M&M gender reveal cake for my first, and wanted to try something different this time, so I decided on an ombre cake!
This is something I have always wanted to do since I saw it on Pinterest. The cake is a coconut cake adapted from Sally’s Baking Addiction.


At this time, my parents were visiting us and B’s mom lives with us. I had to bake this cake in secret as I didn’t want anyone else to know; only B and I knew the sex.
Even before I got the results, I knew it was going to be a girl since I had the exact same symptoms (horrible, intractable nausea/vomiting), cravings (oranges) and aversions (ice cream). I was super excited since Isabelle is so sweet and easygoing, so I’m partial to girls. As a bonus, we can reuse all our clothes/girl items. B was in shock as he is surrounded by all girls (his mom, me, Nike, Isabelle, and now baby #2) and was hoping for a boy to join his team. But he loves being a girl dad (Isabelle totally has him wrapped around her finger) and will do great.


As I only had one cake pan (somehow we lost the other two during our move), baking each layer one by one was painfully time consuming. I spent ALL day baking. Later that night at 10pm:
Mom: B seems to be eating your cake
Me: That’s fine, I told him to eat the domes
Mom: What part is the dome? B seems to be eating the entire cake
Me: The dome is the top part I slice off each layer to make the cake flat
Mom: I think you should take a look….
Lo and behold, he ate my actual cake! He thought it was an “extra layer”
Me: OMG, YOU ATE THE CAKE LAYER!!
B: Oh really? Oops. The cake was so good you should be flattered. It’s a compliment as a chef!

I was not flattered at all, and I couldn’t have an ombre cake without enough layers. So I stayed up after midnight frantically baking two more layers (again baking each layer one by one due to my sad lack of cake pans) since our Zoom gender reveal was the next day at noon.
I was super mad at the time, but it made for a funny memory, and fortunately, I was able to complete everything in time for the party. I did go out and buy a bunch of cake pans to avoid baking layers one at a time ever again.
We can’t wait to welcome baby girl #2 – Isabelle has no idea what’s coming, but it’s going to be a lot of chaos and fun!
Ombre Gender Reveal Cake // Coconut Cake
Ingredients
COCONUT CAKE
2 and 1/2 cups cake flour (I used regular flour + cornstarch as a cake flour substitute)
2 teaspoons baking powder
1/2 teaspoon baking soda
1 teaspoon salt
3/4 cup (1.5 sticks) unsalted butter, softened
1 and 1/3 cups granulated sugar
5 large egg whites, room temperature
1/2 cup sour cream, room temperature
2 teaspoons pure vanilla extract
1 cup canned coconut milk
1 cup shredded coconut (I did half unsweetened/sweetened)
Filling of choice: I used Marionberry (Orgeon blackberry) jam
Optional: Food coloring, sprinkles
COCONUT CREAM CHEESE BUTTERCREAM
1 cup (2 sticks) unsalted butter, softened
one 8 ounce cream cheese, softened
4-5 cups confectioners’ sugar
2 Tablespoons canned coconut milk
1/2 teaspoon pure vanilla extract
1 cup sweetened shredded coconut
Directions
Preheat oven to 350°F (177°C). Grease 6-inch cake pans (I ended up with 4 layers and just reused my pans), line with parchment paper, then grease the parchment paper.
CAKE: Whisk the cake flour, baking powder, baking soda, and salt together. Set aside.
Using a mixer, beat the butter and sugar together on medium-high speed until smooth and creamy, about 2 minutes. Beat in the egg whites until combined, then add the sour cream, vanilla extract, and coconut extract. Beat until combined. Mixture will look curdled as a result of the varying textures and solid butter combining. Scrape down the sides and up the bottom of the bowl as needed.
Slowly add the dry ingredients, coconut milk, then shredded coconut and hand mix (to avoid overbeating) after each addition. The batter will be slightly thick.
OMBRE: To make the ombre, pour the regular batter into a cake, then add a little more food coloring each layer before pouring into each cake pan (you can make however many layers you want; I would do minimum of 3 for the ombre effect). Bake for around 25-30 minutes or until the cakes are baked through and a toothpick comes out clean, it’s done. Allow cakes to cool before removing from pan. Place in fridge once cooled.
FROSTING: In a large bowl, with a mixer beat the butter and cream cheese together on medium speed until creamy and smooth, about 2 minutes. Add confectioners’ sugar, coconut milk, coconut extract, and beat at high speed for 3 minutes. Add more confectioners’ sugar if frosting is too thin, more coconut milk if frosting is too thick. Do not add shredded coconut yet (you cannot frost smoothly with shredded coconut).
ASSEMBLE: Using a large serrated knife, slice a thin layer off the tops of the cakes to create a flat surface. Place 1 cake layer on your cake stand or plate. Evenly cover the top with frosting and then jam filling. Top the 2nd and 3rd cake layers each with frosting and jam filling as you stack them. Top with the final cake layer. Spread the a very thin layer of the frosting all over the top and sides to make the “crumb coat”. This does not have to be perfect; it is just to seal in the crumbs so they don’t mix with the final frosting layer. Chill in the fridge for at least 30 min, or overnight.
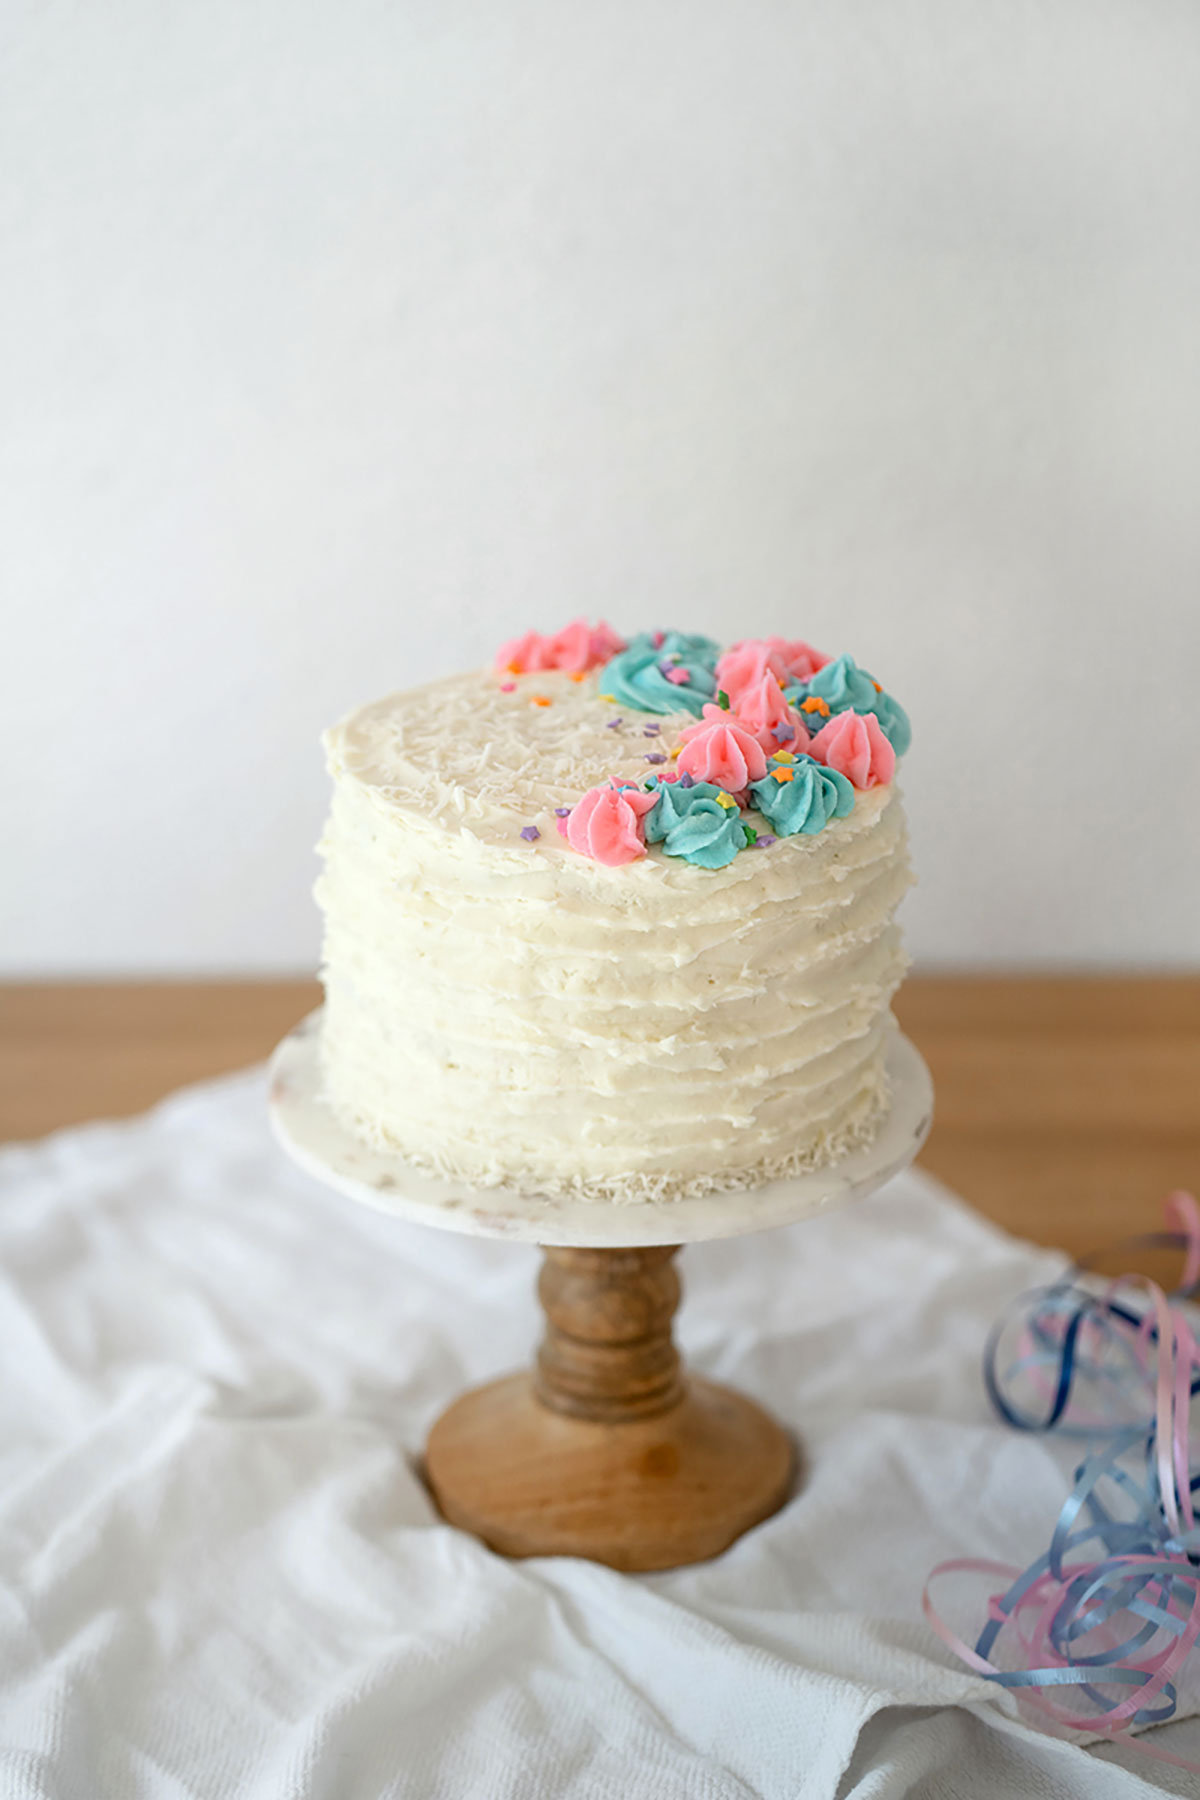
DECORATE: Set aside frosting for any piping/flowers you want to make. Mix the shredded coconut to the rest of the frosting. Using a knife and spatula, apply frosting all over the top and sides of cake. I did a rustic style since it is hard to get smooth sides with shredded coconut. With the remaining non shredded coconut frosting apply any food coloring (I did pink and baby blue) and pipe flowers on the top using a 1M wilton tip. Apply sprinkles and extra shredded coconut for decoration.
Refrigerate cake for at least 30 minutes before slicing to help the cake hold its shape when cutting. Cover leftover cake tightly and store in the refrigerator for up to 5 days.